
In this tutorial, I'm going to show how to join two shells together using Netfab Basic (available for free from www.netfabb.com)
Note: for the specific geometries in this sample, Netfabb is perhaps not the best tool for the job, but this technique can be used to solve several other issues as well.
Click any image to zoom.
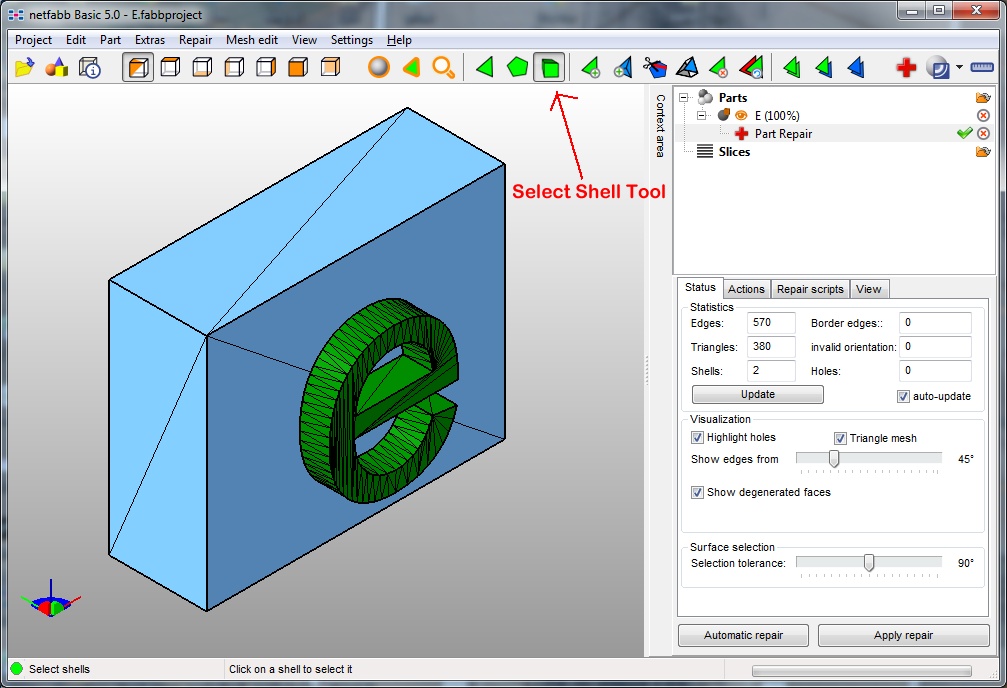
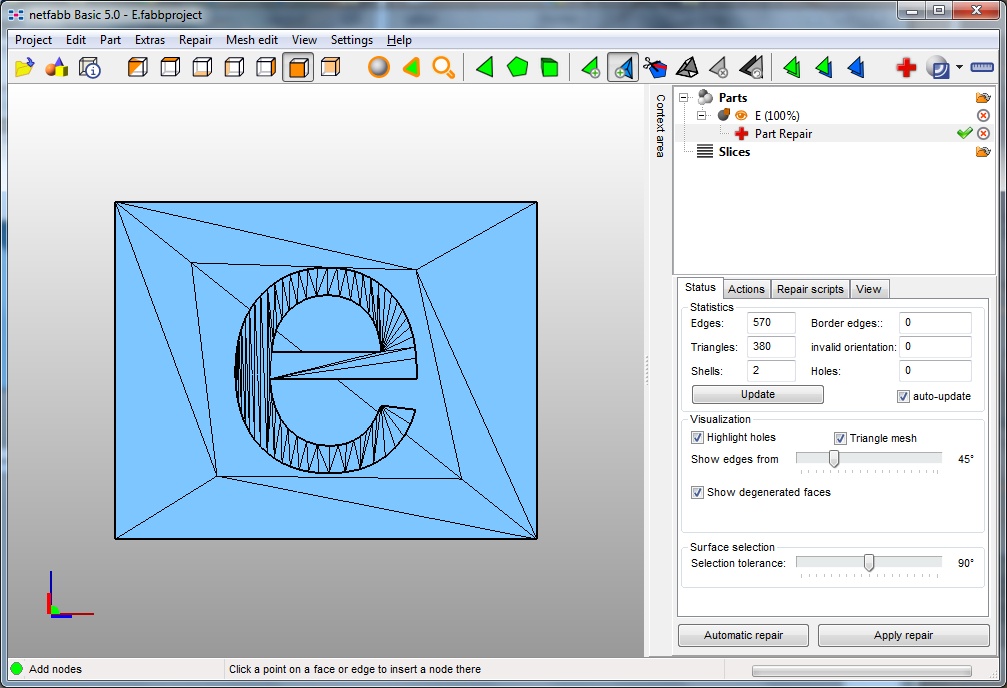
| Step 1 | Load the STL file into Netfabb. Click the red + sign to start Repair mode. You can then use the Select Shell Tool to explore your model and any shells that are separate from other shells on the model. Note: it doesn't hurt to run the STL thru cloud.netfabb.com first so as to weld together the main body of your model, leaving only the "floating" shells to worry about. |
|
| Step 2 | This model has
two shells that we want to join together. Using Rotate and
Zoom, position yourself so that you can see the back side of letter
"e". Use the "Select Surfaces" tool to select the entire back of
the letter "e" |
|
| Step 3 | Here's the model with the back of the letter "e" removed. |

|
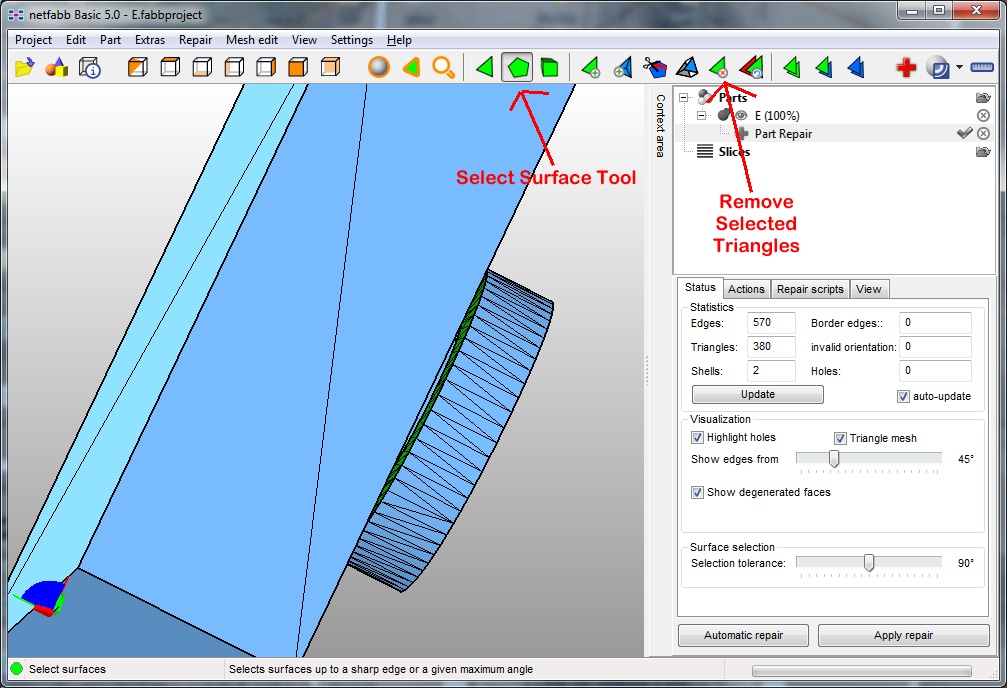
| Step 4 | We could use the same process to remove the surface that the "e" is supposed to join to, but as you can see in this case, that would give us a very large surface to work with - possibly more area than we really want. | 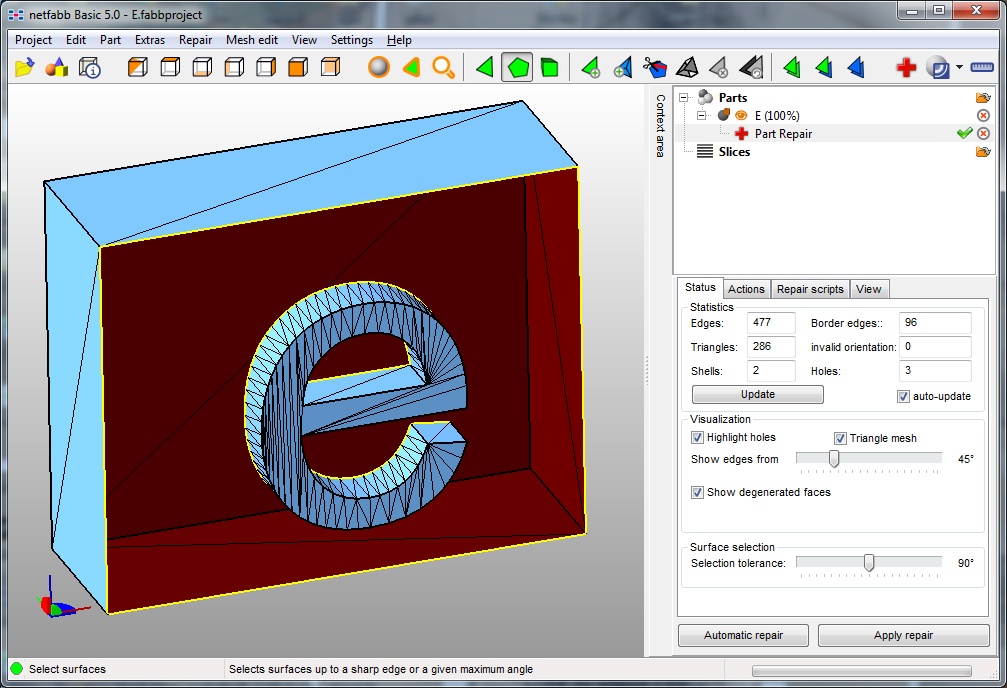
|
| Step 5 | So, use the "Add Nodes" tool to add extra nodes to the back wall.. so that we have a smaller area to work with. |
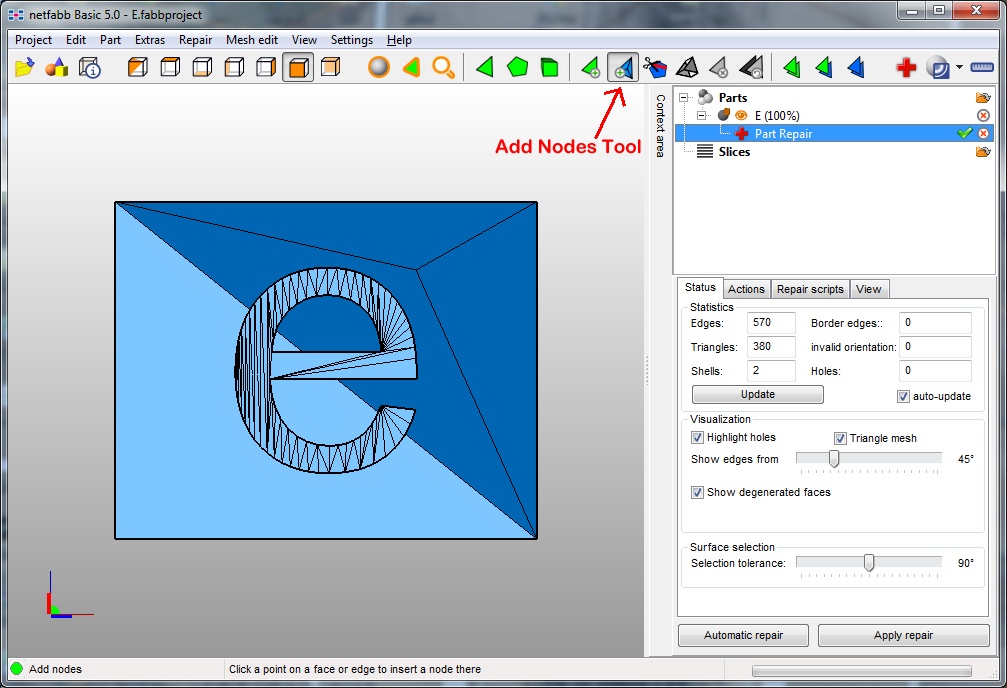
|
| Step 6 | Adding a few nodes gives us a smaller region. |
|
| Step 7 | Now, use the "Select Faces" tool and remove the triangles directly behind the letter "e" |
|
| Step 8 | That gives us a
hole in the main body to mate to, and the back of the "e" is also
now a hole. We can start closing up the holes. If you were at this point to use the "Close All Holes" tool, it would simply put us back with the two shells we started with. What we need to do is give Netfabb some "hints" as to how it should close the holes. |

|
| Step 9 | Select the "Add Triangles" tool. Then with the mouse click on one edge, turning it blue. |
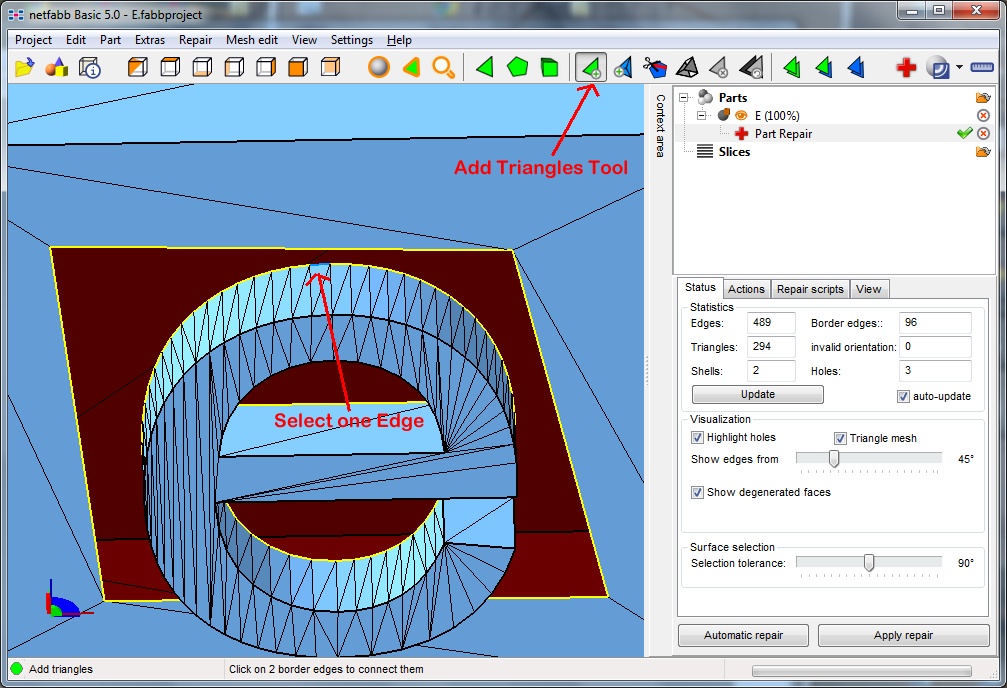 |
| Step 10 | Then, drag the mouse to any other edge. You'll see that it fills in the gap with a green triangle |
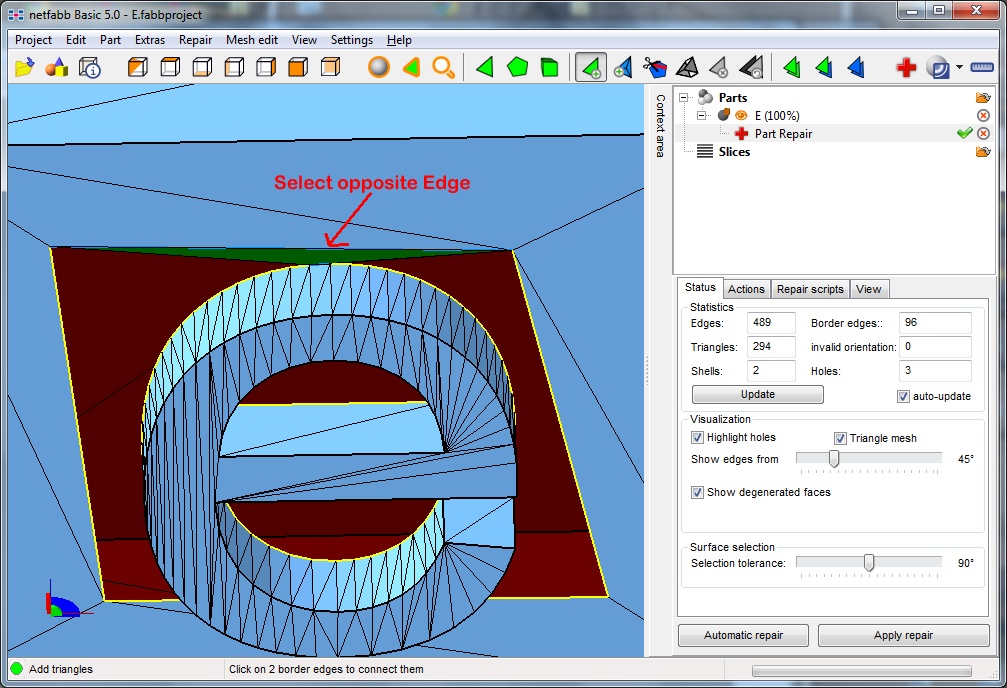
|
| Step 11 | If you then click the mouse again, Netfabb will fill in the green area with actual faces. |
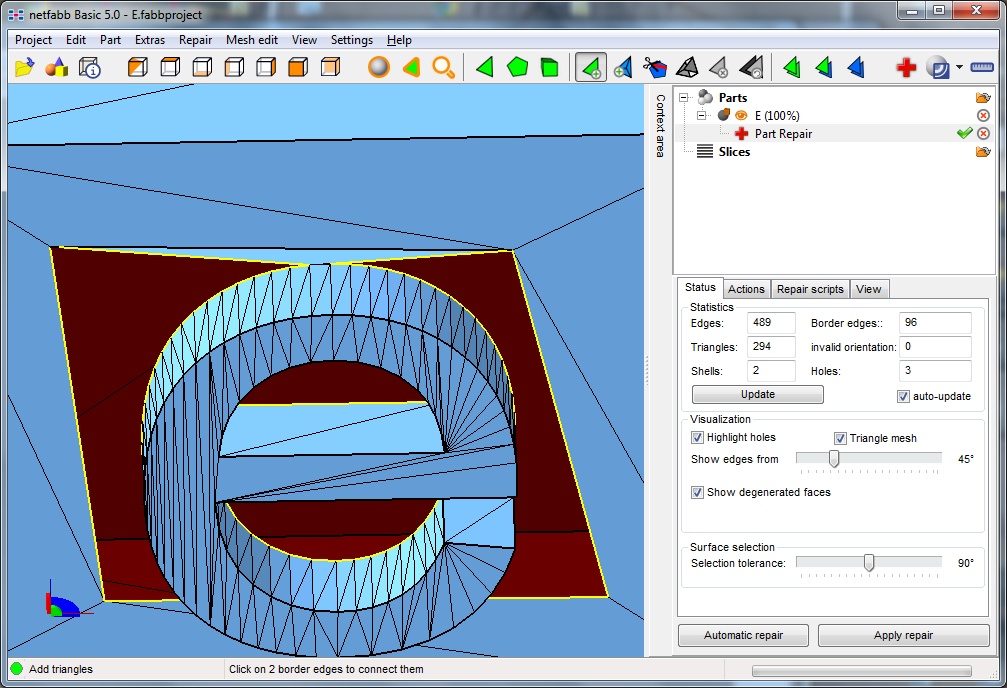
|
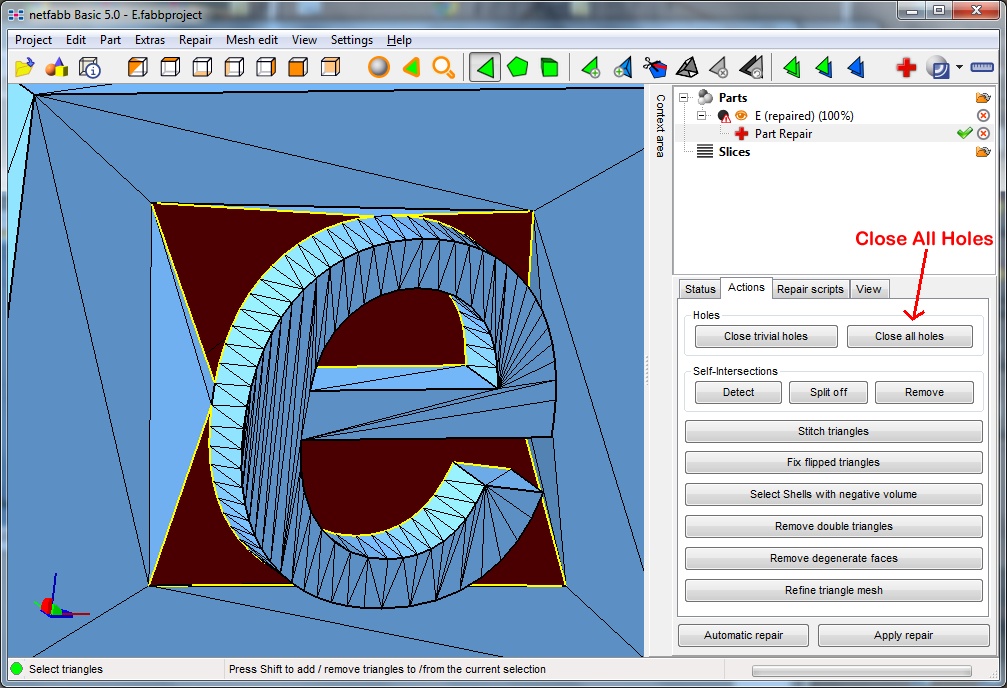
| Step 12 | Work your way
around the "e", selecting a number of faces to fill in manually -
you don't have to fill in everything, but you should fill in enough
so that it is not ambiguous where the automated repair tool should
fill in the gaps. Then click the "Close All Holes" button. |
|
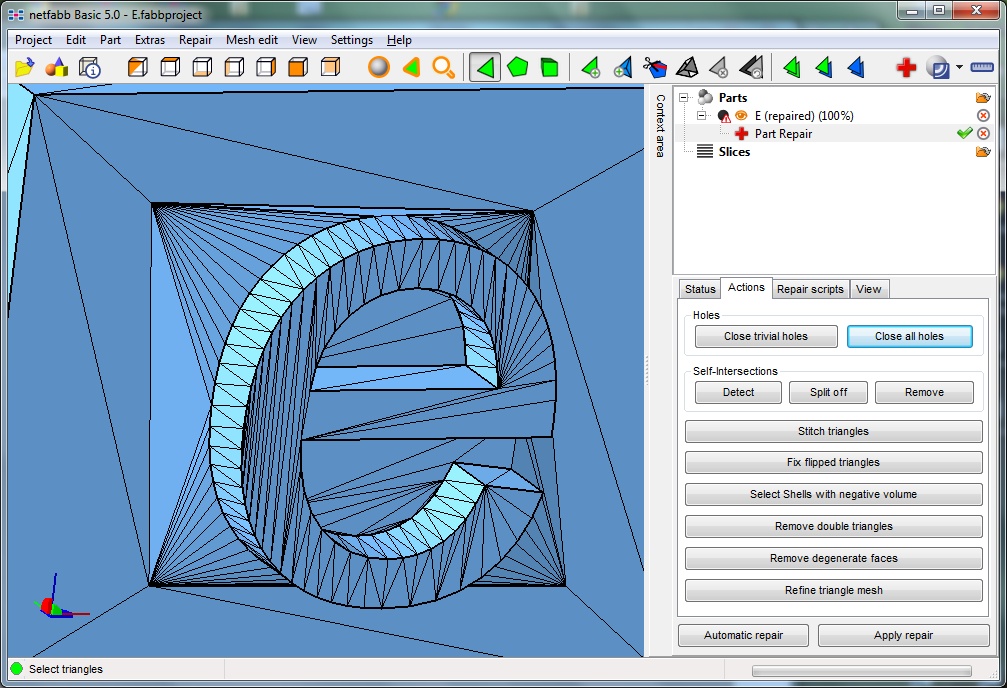
| Step 13 | Here's the result. |
|
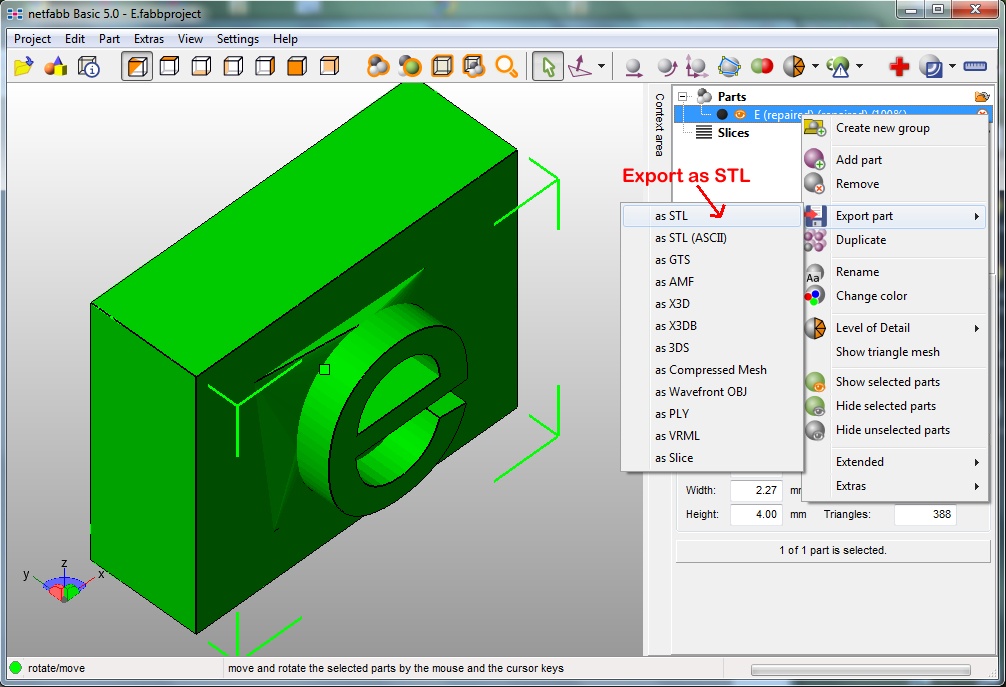
| Step 14 | And what it
looks like from a side view. Remember to click "Apply Repair" to make your changes permanent. |

|
| Step 15 | Right click the
shell, then select Export and STL. Save the file.. upload it to Shapeways.... |
|
| Step 16 | Order, paint and enjoy |