
In this tutorial, I'm going to show how to fix the situation where you expecteda hole, but instead got a surface. I'm going to be using Netfabb Basic (available for free from www.netfabb.com)
Click any image to zoom.
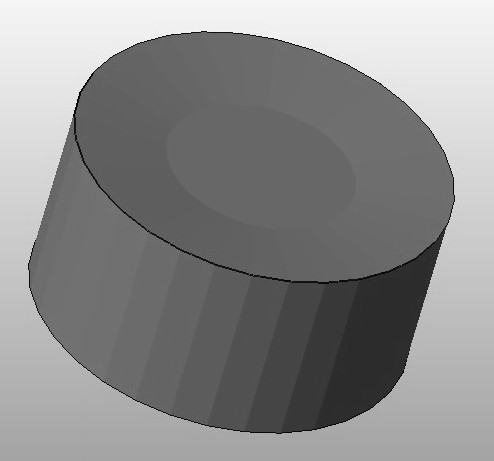
| Step 1 | I have a model that I uploaded to Shapeways, and I was expecting a donut shape, but instead it turned out to be a closed cylinder. |
|
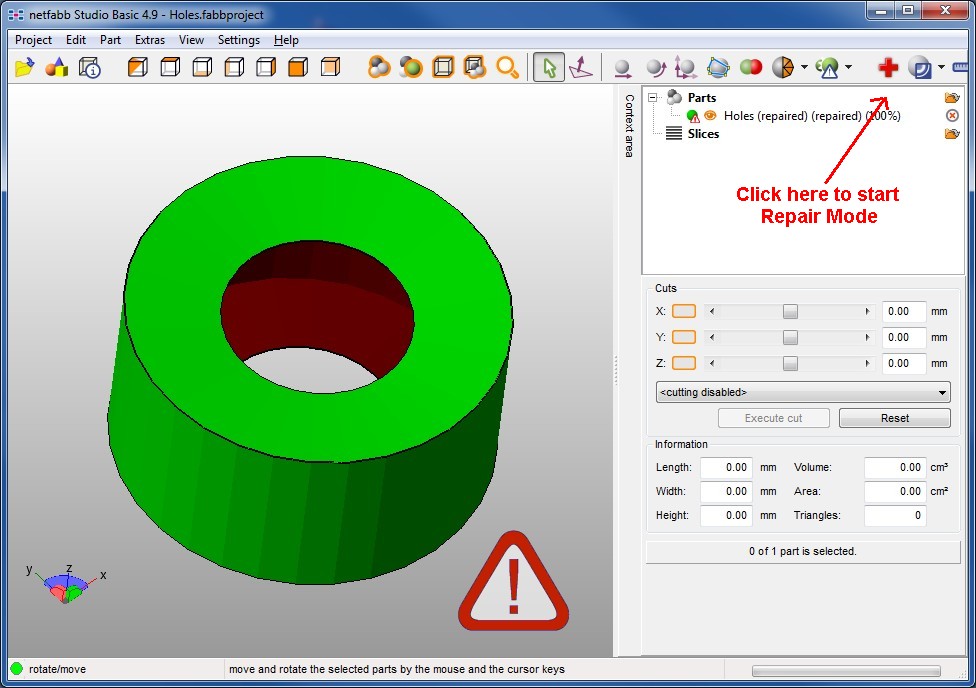
| Step 2 | Load the STL file into Netfabb. Observe the red red exclamation point - there is some kind of problem here. Click the red + sign to start Repair mode. |
|
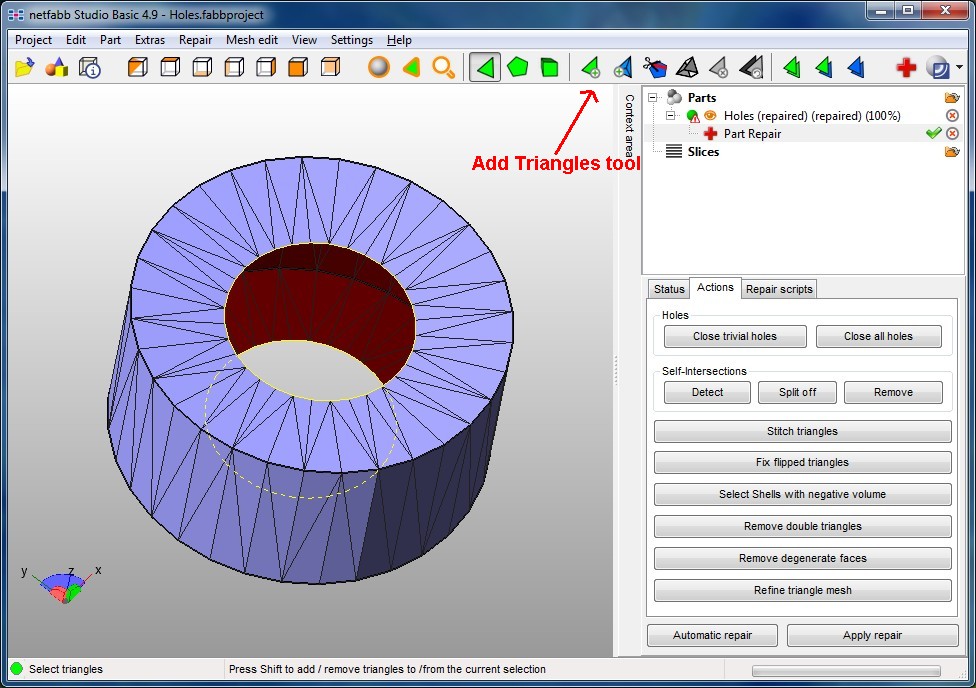
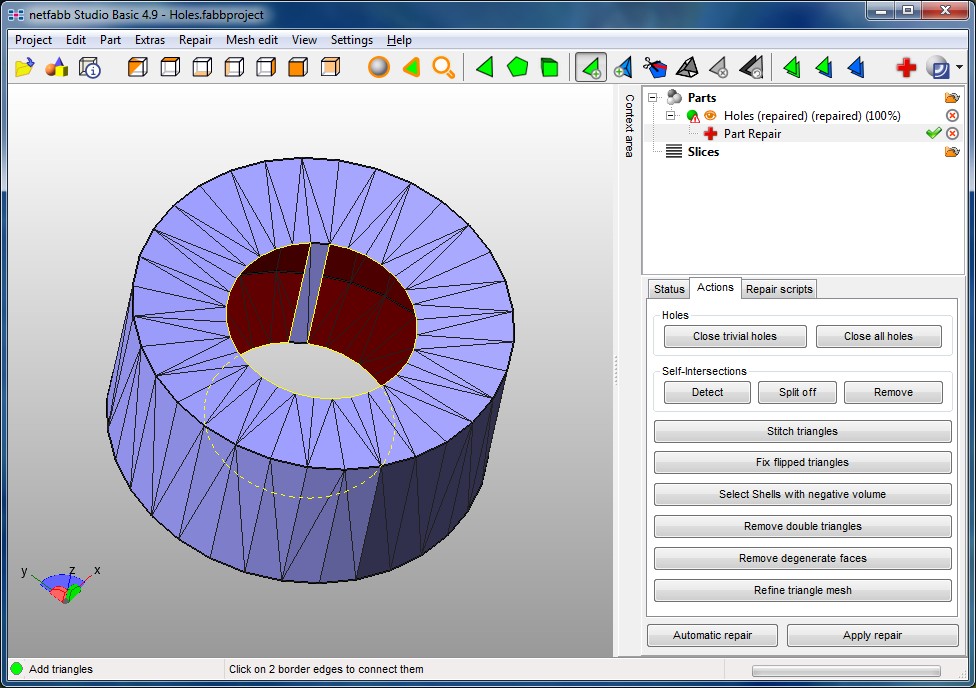
| Step 3 | Note that the
internal edges are outlined in Yellow, and that you can see the
inside surfaces of the model in red. This means that there
is a HOLE at that point, and it must be sealed up before you can
3d-print the model. Several programs, including Shapeway's Mesh Medic will repair these two holes by taking the
shortcut of sealing the circle - it won't take the option of making
it a donut. Click the Add Triangles icon. |
|
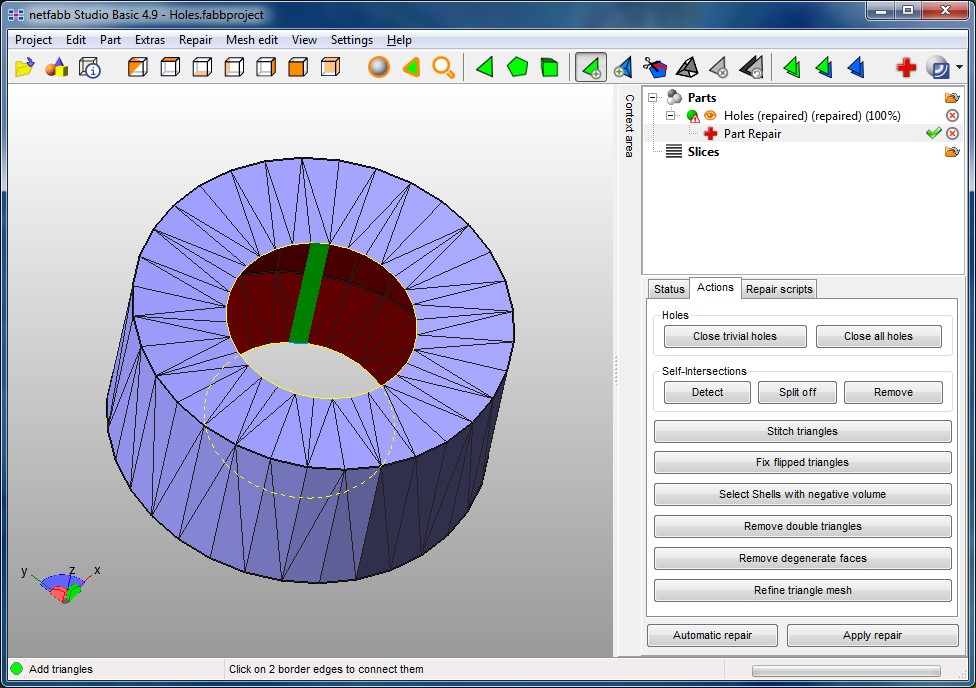
| Step 4 | Select one of the vertexes by left-clicking on it. The line should turn from yellow to blue. |

|
| Step 5 | Drag your mouse across to a matching spot on the other side. A green shape will be displayed connecting the two sides together. Often, this produces two triangles to make a rectangular shape. |
|
| Step 6 | Left click to add the triangle(s). The newly added triangles should show up as pale blue. |
|
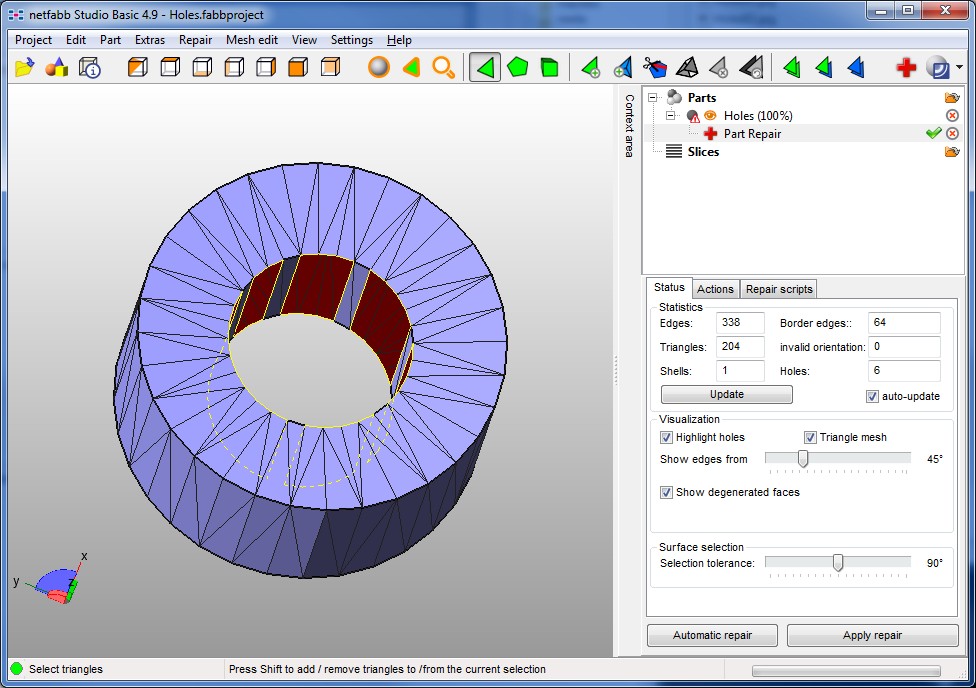
| Step 7 | Add a few additional triangles around the edge so that your intended geometry is obvious. |
|
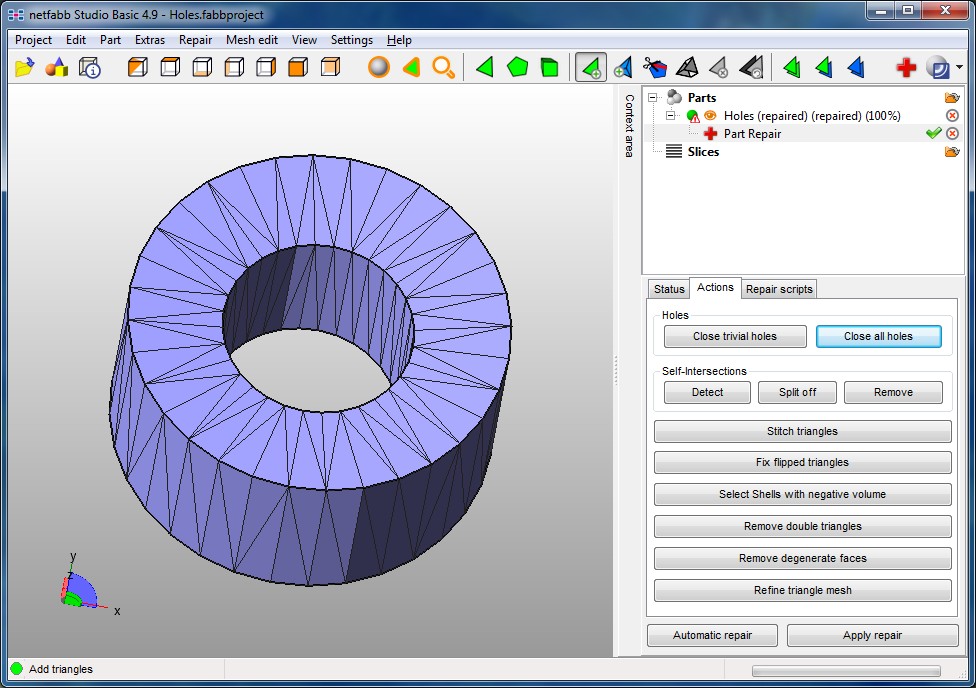
| Step 8 | Now, use the "Close Holes" tool - it should follow your "hints" and heal all the holes - producing the desired donut. |
|
| Step 9 | Click "Apply Repair" and then right-click the model and select "Export as STL". Once you've exported the file, you can upload it to Shapeways, and Mesh Medic will be happy with your model. |