
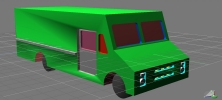
There are tons of small details you can add to this model. take a small sphere, stretch it into an oval, rotate it 90°, and place it up on the top as one of the running lights. As with the prior steps, copy the item, position the copies, and then select the main body and do ObjectUnion to merge them into the main body. You can also add running lights to the back end.
There's a stripe down the side of the van that protrudes a slight amount. Add a cube to your workspace make it 0.25 high and 0.50 wide, then stretch it to the length of the side panel. Position it correctly, copy it to the other side, then Union them onto the body.
If you managed to "lose" them thru the process so far, you may want to add bumpers.
Wheels. Ah, wheels. I think wheels deserve an entire second tutorial. (coming soon) My advice here is to make that bottom edge of the truck straight, ignoring the wheel wells. Then, after you build your wheels, add a cylinder to the model that is just a slightly bigger diameter than the wheels. Position it correctly, and then do an object-subtract so that you get nice smooth wheel wells, better than you can carve out by hand.
As a last, but important, step, you need to determine if your model needs to be hollow or not. Making the model hollow can really cut down on the costs. You just must watch how thin you make the walls, or that'll become a problem.. still much follow the design limits.
All I do for hollowing is add a few boxes inside, get them to the right dimensions and position, then subtract them from the main body. You also need at least one "hole" between the inner void and the outside surface. It doesn't need to be very big, but the inner surface must "connect" with the outer service. In my model, I chose to make this hole from outside to inside thru the radiator.
Click to download SCN file. |
Step 9: export as STL